

How to Set Up Custom Maps
Playing Custom Maps is now easier than ever with a brand new tool and website to get any map you like in minutes!
Quick Steps to Set Up Custom Maps
Custom Maps are quick to set up now, and should only take you about 5-10 minutes to get everything ready for the first time, then after that we’ve made playing Custom Maps with friends as easy as the click of 2 buttons!
To run Custom Maps on Epic Client by yourself, you’ll need:
Custom Map Loader
To run Custom Maps with friends on Epic Games Client, you’ll need 2 additional things:
- Bakkesmod + Rocket Plugin
- Hamachi
How to use the Custom Map Loader:

Step 1
Click to download the Custom Map Loader here.

Step 2
Double click the downloaded installer.
Click Run.

Step 3
Run the installer
If you get this warning, it is because the app has not been given a certificate yet
Click on info, then run anyway to start the install

Step 4
Feel free to click and drag the ball around while it installs files
Not an actual step
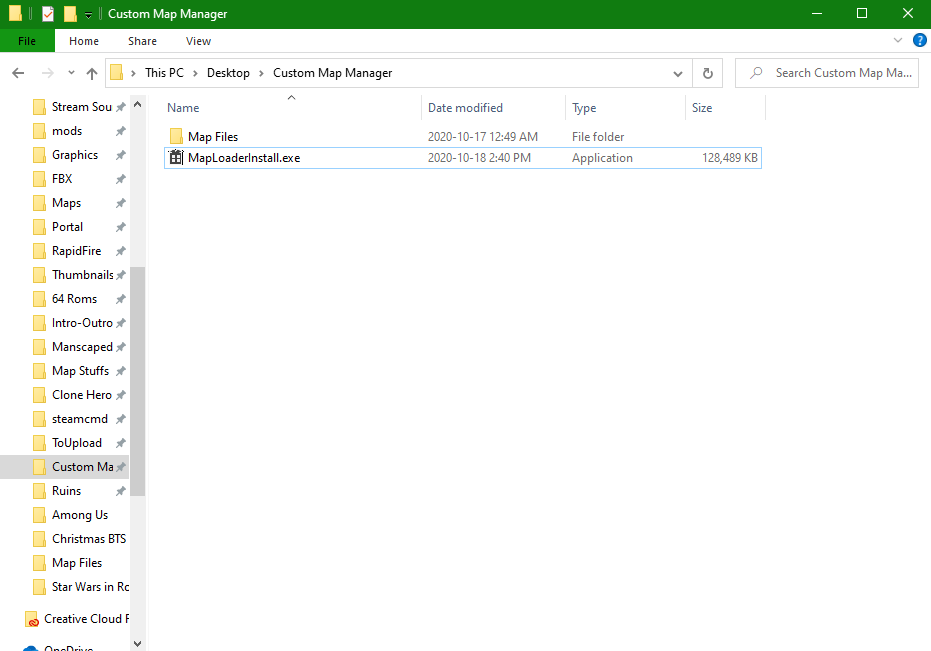
Step 5
Create a folder next to the exe and name it “Map Files.

Step 6
On first load-up, the Custom Map Loader will ask you to load your map directory
Click on the “Map Files” folder you created in Step 3 and click “select folder”

Step 7
Read the ? to help you find the “rocketleague” folder on your computer
Click on Locate Folder
NOTE: This is the actual rocket league install folder. EPIC Launcher creates a separate “Rocket League” folder on your computer that is unrelated. The name of this folder will be “rocketleague”

Step 8
As the ? will say, this is commonly where your steam files are found (default is usually C:\Program Files\Epic Games\rocketleague or C:\Program Files\Steam\steamapps\common\rocketleague)
Find your “rocketleague” folder and click “select folder”

Step 9
The app is now installed and ready to be used!
The easiest way to import maps is to download them off this site and then click on the “import” button.

Step 10
To import a map, it is as easy as downloading a .zip folder from this website and then importing it with the app.
Just click import and navigate to the map you download and select it.
The Custom Map Loader will see new maps every time it’s loaded for now.
I’d suggest pinning the Custom Map Loader to the taskbar. If you don’t want to, just search up CustomMapLoader in the Start Menu.
To play your custom map you loaded, just open up Underpass in Freeplay or LAN Match. Enjoy!
*The Custom Map Loader will now install textures needed for custom maps to work.
This means no more needing to download these! Yay!*
How to Uninstall the Custom Map Loader
This app can be uninstalled through regular “Uninstall or Remove Programs” but if that doesn’t work:
Go into your files on the computer
In the address bar, type in %appdata%
Delete the “Custom Map Loader” folder in AppData\Roaming
Delete the “CustomMapLoader” folder in AppData\Local
How to set up Bakkesmod:

Step 1
Download Bakkesmod here
Click on the blue hyperlink to download

Step 2
Extract and place the exe where you’d like and run the installer
Click on Yes to install Bakkesmod

Step 3
Bakkesmod should now be installed and you should have a window that looks like this
Keep this open for Step 4

Step 4
Download Rocket Plugin here
Have Bakkesmod running (like Step 3) and click on the blue “Install with Bakkesmod” button
This should download and install the Rocket Plugin into the Bakkesmod folders
If this doesn’t install automatically, follow Step 5
If this works, you’re done! Bakkesmod is ready to go
Press F2 in game to open Bakkesmod

Step 5 (if Step 4 failed)
Manually Download Rocket Plugin
Go to Bakkesmod and go to file->Open Bakkesmod folder
Open the Rocket Plugin Zip Folder
Place each file in its proper folder locations in the Bakkesmod files
Check the photo for where the files should be located at the end
How to Uninstall Bakkesmod
Go into Bakkesmod, click on File->Open Bakkesmod folder
In the address bar, click on Win64
Delete the “bakkesmod” folder
How to connect with friends using Hamachi:

Step 1
Download Hamachi here
Click the green “Download now” button
Run the installer and make sure to disabled any additional programs from installing if prompted

Step 2
Once Hamachi is installed, set up an account with email and password
You should have a window like this —>
Turn the Power button on to have your VPN active

Step 3
Once the power button is on, click on Network
To Host:
Create a new Network
Enter a unique name and password
Give the name and password to your friends
Have your friends right-click your computer in the network and copy ipv4 address
For 6 or more players, create a second network for the remaining players to connect to you. You only need each player to see you in at least 1 network to be able to connect
Ensure your connection to all players is green (not blue or grey)
Blue means routing issue/relay tunnel (could be solved by changing firewall settings or restarting router), grey means host’s hamachi is offline
To Connect:
Join an existing network
Enter name & password given by the host
Once in the network, right click the host’s name in the network and copy ipv4 address
Ensure your connection to the host is green (not blue or grey)
Blue means routing issue/relay tunnel (could be solved by changing firewall settings or restarting router), grey means host’s hamachi is offline

Step 4
Choose what map you would like to play with your friends, and ensure EVERYONE clicks “Load” in the Custom Map Loader before trying to host or join
Keep the Custom Map Loader open while the game is running

Step 5 (In Game)
Have Bakkesmod running (see how to set up Bakkesmod above)
Open Rocket Plugin using the Home button
If a window doesn’t open, press F2 to open Bakkesmod, and navigate to the plugins tab
Click on Rocket Plugin in the dropdown menu (if you don’t see it here, it may not have installed properly, see Step 5 of installing Bakkesmod)
Click on Open Rocket Plugin GUI

Step 6
To Host a match, either start a LAN match in the Custom Games tabs in-game, or use the left-hand side of Rocket Plugin to set your settings and map. Rocket Plugin allows you to run any game mode on the “Underpass” map like Dropshot for certain Dropshot custom maps
To join, all you need to do is use the copied ipv4 and paste it in the “local ip address” and click join once the host is in the map
Do not mess with any other “join a local game” settings. Just put the ipv4 in and join, that’s it

Step 7 (Host only)
If you’re using Rocket Plugin to create the LAN match, pick “Underpass” from the map dropdown menu
Feel free to change the mutator and game mode settings as you prefer
Click host in the bottom left
Let your friends know when you’re in the map and they can join
Common Issues:
Content mismatch when joining:
This means the map is not the same as the host’s map, make sure to coordinate which map you’re loading
Unable to connect to host:
Check that your power on Hamachi is on, and your connection to the host is green. Restart Hamachi if that doesn’t work
Game Crashes:
Yep… this may happen here and there, it’s more common on larger file-size maps. Just restart Rocket League and rejoin. It shouldn’t crash once the map is loaded
How to Uninstall Hamachi
This app can be uninstalled through regular “Uninstall or Remove Programs”